Starting a career in music, podcasting, or voice-overs can be both exciting and intimidating, especially when it comes to choosing the right equipment. One of the most crucial components for any beginner is a good quality microphone. With so many options available in the market, it can be overwhelming to decide which one to invest in. For those who are new to the world of audio recording, finding the best microphones for beginners is essential to produce high-quality sound and achieve professional results.
Whether you’re planning to record vocals, instruments, or spoken words, having the right microphone can make all the difference in the quality of your recordings. A good microphone can help to capture the nuances of your voice or instrument, while a poor one can lead to a lackluster sound that fails to impress. In this article, we will guide you through the process of selecting the perfect microphone for your needs, covering the key factors to consider, the different types of microphones available, and our top picks for beginners. By the end of this article, you’ll be well-equipped to make an informed decision and start producing high-quality recordings that showcase your talent.
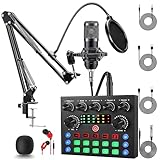
We will cover the best microphones for beginners later in this article. Meanwhile, feel free to check out these related products on Amazon:


Last update on 2026-05-15 / #Ad / Affiliate links / Images from Amazon Product Advertising API
Introduction to Microphones for Beginners
When it comes to recording audio, having the right microphone can make all the difference in the quality of the sound. For those who are new to the world of audio recording, navigating the various types of microphones available can be overwhelming. With so many options on the market, it’s essential to understand the basics of microphones and what to look for when selecting one.
Microphones are devices that convert sound waves into electrical signals, allowing us to capture and record audio. They come in a variety of shapes, sizes, and types, each with its unique characteristics and uses. From dynamic microphones to condenser microphones, and from USB microphones to ribbon microphones, the options can be daunting for beginners. However, by understanding the different types of microphones and their applications, beginners can make informed decisions when choosing a microphone.
For beginners, the key to finding the right microphone is to consider their specific needs and goals. What type of audio are they trying to record? Will they be recording vocals, instruments, or both? Will they be recording in a studio or on location? Answering these questions can help narrow down the options and make it easier to find the best microphones for beginners. By selecting a microphone that meets their needs, beginners can achieve high-quality audio recordings and take their skills to the next level.
In the world of audio recording, having a good microphone is essential for producing high-quality sound. Whether you’re a musician, podcaster, or videographer, a good microphone can make all the difference in the quality of your recordings. With so many microphones available, it’s essential to do your research and find the one that’s right for you. By understanding the basics of microphones and what to look for, beginners can find the perfect microphone to suit their needs and start creating high-quality audio recordings.
Best Microphones For Beginners – Reviews
The
1. Blue Yeti Microphone
is a popular and highly-regarded microphone among beginners. It’s a USB microphone that connects directly to your computer, making it easy to set up and use. The Blue Yeti is a condenser microphone, which means it’s capable of capturing a wide range of frequencies and producing high-quality audio. It’s also a versatile microphone, with multiple pickup patterns that allow you to record in different environments and settings.
The Blue Yeti is a great choice for beginners because it’s easy to use and produces great sound quality. It’s also relatively affordable, with a price point that’s lower than many other high-end microphones. The Blue Yeti is a great option for podcasting, voiceovers, and music recording, and it’s also a good choice for live streaming and online video production. Overall, the Blue Yeti is a great microphone for beginners who want to produce high-quality audio without breaking the bank.
The
2. Rode NT-USB Microphone
is a studio-grade microphone that’s designed specifically for beginners. It’s a condenser microphone that’s capable of producing high-quality audio, and it’s also relatively easy to use. The Rode NT-USB is a side-address microphone, which means you’ll need to speak into the side of the microphone rather than the top. This can take some getting used to, but it’s a great way to reduce plosive sounds and produce smoother audio.
The Rode NT-USB is a great choice for beginners because it’s easy to set up and use, and it produces great sound quality. It’s also a versatile microphone, with a range of features that make it suitable for different types of recording. The Rode NT-USB is a great option for podcasting, voiceovers, and music recording, and it’s also a good choice for live streaming and online video production. Overall, the Rode NT-USB is a great microphone for beginners who want to produce high-quality audio and have a range of features and options to choose from.
The
3. HyperX QuadCast Gaming Microphone
is a popular microphone among gamers and streamers, but it’s also a great choice for beginners who want to produce high-quality audio. It’s a condenser microphone that’s capable of capturing a wide range of frequencies, and it’s also relatively easy to use. The HyperX QuadCast is a USB microphone that connects directly to your computer, making it easy to set up and use. It’s also a versatile microphone, with multiple pickup patterns and a range of features that make it suitable for different types of recording.
The HyperX QuadCast is a great choice for beginners because it’s easy to use and produces great sound quality. It’s also relatively affordable, with a price point that’s lower than many other high-end microphones. The HyperX QuadCast is a great option for podcasting, voiceovers, and music recording, and it’s also a good choice for live streaming and online video production. Overall, the HyperX QuadCast is a great microphone for beginners who want to produce high-quality audio and have a range of features and options to choose from.
The
4. Audio-Technica AT2020USB+ Microphone
is a side-address condenser microphone that’s designed specifically for beginners. It’s a USB microphone that connects directly to your computer, making it easy to set up and use. The Audio-Technica AT2020USB+ is a versatile microphone, with multiple pickup patterns and a range of features that make it suitable for different types of recording. It’s also a great choice for podcasting, voiceovers, and music recording, and it’s also a good option for live streaming and online video production.
The Audio-Technica AT2020USB+ is a great choice for beginners because it’s easy to use and produces great sound quality. It’s also relatively affordable, with a price point that’s lower than many other high-end microphones. The Audio-Technica AT2020USB+ is a great option for beginners who want to produce high-quality audio without breaking the bank. It’s also a great choice for those who want a versatile microphone that can handle different types of recording. Overall, the Audio-Technica AT2020USB+ is a great microphone for beginners who want to produce high-quality audio and have a range of features and options to choose from.
The
5. Samson Meteor Mic Microphone
is a compact and portable microphone that’s designed specifically for beginners. It’s a condenser microphone that’s capable of capturing a wide range of frequencies, and it’s also relatively easy to use. The Samson Meteor Mic is a USB microphone that connects directly to your computer, making it easy to set up and use. It’s also a versatile microphone, with multiple pickup patterns and a range of features that make it suitable for different types of recording.
The Samson Meteor Mic is a great choice for beginners because it’s easy to use and produces great sound quality. It’s also relatively affordable, with a price point that’s lower than many other high-end microphones. The Samson Meteor Mic is a great option for podcasting, voiceovers, and music recording, and it’s also a good choice for live streaming and online video production. Overall, the Samson Meteor Mic is a great microphone for beginners who want to produce high-quality audio and have a range of features and options to choose from. It’s also a great choice for those who want a compact and portable microphone that can be taken on the go.
Why People Need to Buy Microphones for Beginners
People who are just starting out with recording or public speaking often underestimate the importance of a good microphone. They may think that the built-in microphone on their device is sufficient, but this can lead to poor sound quality and a lack of clarity. Investing in a dedicated microphone can make a huge difference in the quality of their recordings or presentations. Whether they are podcasters, YouTubers, or musicians, a good microphone is essential for capturing their voice or sound accurately.
One of the main reasons people need to buy microphones for beginners is that built-in microphones are often not designed for high-quality sound capture. They can pick up background noise, distort the sound, and lack the frequency range to capture the full depth of the voice or instrument. A dedicated microphone, on the other hand, is designed specifically for sound capture and can provide a much clearer and more accurate representation of the sound. This is especially important for people who are just starting out, as they want to make a good impression and provide high-quality content to their audience.
When it comes to choosing the right microphone, there are many options available. The best microphones for beginners are those that are easy to use, provide good sound quality, and are affordable. They should also be compatible with the device they are using, whether it’s a computer, smartphone, or recording studio. Some popular types of microphones for beginners include USB microphones, condenser microphones, and dynamic microphones. Each type has its own strengths and weaknesses, and the right choice will depend on the individual’s specific needs and preferences.
In conclusion, buying a microphone is an essential investment for anyone who wants to produce high-quality recordings or presentations. Whether they are just starting out or looking to upgrade their existing equipment, a good microphone can make a huge difference in the quality of their sound. By choosing the right microphone for their needs, beginners can ensure that their voice or instrument is captured accurately and with clarity, and that their audience receives the best possible listening experience. With so many options available, it’s easier than ever to find the perfect microphone and start producing high-quality content.
Understanding Microphone Types and Uses
The type of microphone to use depends on the specific application, whether it’s for recording vocals, instruments, or live performances. Dynamic microphones are rugged and can handle high sound pressure levels, making them ideal for live performances and loud instruments. Condenser microphones, on the other hand, are more sensitive and suitable for recording vocals and acoustic instruments in a studio setting. Ribbon microphones offer a warm and smooth sound, often used for recording vocals and instruments in a studio.
When choosing a microphone, it’s essential to consider the frequency response, which refers to the range of frequencies the microphone can capture. A microphone with a flat frequency response is ideal for recording instruments, while a microphone with a tailored frequency response is better suited for recording vocals. Additionally, the polar pattern of the microphone is crucial, as it determines the directionality of the sound pickup. Cardioid microphones are unidirectional, while omnidirectional microphones pick up sound from all directions.
For beginners, it’s recommended to start with a versatile microphone that can handle various applications. A USB microphone is an excellent option, as it can connect directly to a computer and is often plug-and-play. These microphones are ideal for recording vocals, voice-overs, and podcasts. When selecting a microphone, it’s also important to consider the connectivity options, such as XLR or USB, and the included accessories, like a stand or pop filter.
In addition to the technical specifications, the brand reputation and customer support are also vital factors to consider. Reputable brands offer high-quality microphones, and their customer support can be invaluable in case of any issues or questions. By understanding the different types of microphones and their uses, beginners can make an informed decision when selecting the best microphone for their needs.
Setting Up and Using Your Microphone
Once you’ve chosen the right microphone, it’s essential to set it up correctly to achieve the best possible sound quality. The first step is to position the microphone correctly, taking into account the polar pattern and the sound source. For vocals, it’s recommended to position the microphone 6-8 inches away from the mouth, slightly off-center. For instruments, the microphone should be placed close to the sound source, but not so close that it picks up excessive bleed or distortion.
When setting up your microphone, it’s also crucial to consider the acoustic treatment of the room. A room with a lot of reverberation or echo can negatively impact the sound quality, while a room with proper acoustic treatment can enhance the sound. Using a pop filter can also help reduce plosive sounds and prevent distortion. Additionally, investing in a high-quality microphone stand and cable can ensure a stable and secure connection.
To get the most out of your microphone, it’s essential to understand the basic recording techniques. This includes setting the correct gain levels, using the right recording software, and monitoring the sound in real-time. Many microphones come with a built-in headphone amplifier, allowing you to monitor the sound directly from the microphone. By following these best practices, beginners can achieve professional-sounding recordings and get the most out of their microphone.
Furthermore, it’s recommended to experiment with different microphone techniques, such as recording in different rooms or using different microphone positions. This can help you develop your skills and find the best approach for your specific application. By setting up and using your microphone correctly, you can unlock its full potential and achieve high-quality recordings.
Common Microphone Mistakes to Avoid
When using a microphone, there are several common mistakes to avoid, which can negatively impact the sound quality. One of the most common mistakes is incorrect gain staging, which can result in distortion or a weak signal. It’s essential to set the gain levels correctly, taking into account the microphone’s sensitivity and the sound source’s volume. Another mistake is not using a pop filter, which can cause plosive sounds to distort the recording.
Not positioning the microphone correctly is another common mistake, which can result in a weak or unbalanced sound. It’s crucial to experiment with different microphone positions to find the best possible sound. Additionally, not using a high-quality microphone cable or stand can introduce noise or hum into the signal, degrading the sound quality. By avoiding these common mistakes, beginners can ensure a high-quality recording and get the most out of their microphone.
Moreover, it’s essential to handle the microphone with care, avoiding drops or rough handling, which can damage the capsule or other components. Regularly cleaning the microphone and storing it in a protective case can also help maintain its performance and extend its lifespan. By being aware of these common mistakes and taking steps to avoid them, beginners can ensure a professional-sounding recording and protect their investment.
In addition to these technical mistakes, it’s also important to avoid common mistakes related to microphone technique. This includes not warming up before recording vocals, not using a consistent recording environment, and not taking regular breaks to avoid fatigue. By avoiding these mistakes and developing good habits, beginners can achieve high-quality recordings and improve their overall performance.
Upgrading and Expanding Your Microphone Setup
As you become more comfortable with your microphone and recording techniques, you may want to consider upgrading or expanding your setup. One way to do this is by investing in a high-quality microphone preamp, which can provide a cleaner and more detailed sound. Additionally, using a microphone splitter or mixer can allow you to connect multiple microphones to a single input, expanding your recording capabilities.
Another way to upgrade your setup is by investing in a portable recorder or audio interface, which can provide more flexibility and convenience when recording on location. These devices often come with built-in microphones, but can also be used with external microphones, allowing you to capture high-quality sound in a variety of environments. By upgrading your setup, you can achieve higher sound quality, expand your creative possibilities, and take your recordings to the next level.
When upgrading or expanding your setup, it’s essential to consider your specific needs and goals. If you’re recording vocals, you may want to invest in a high-quality condenser microphone or a portable vocal recorder. If you’re recording instruments, you may want to consider a dynamic microphone or a microphone designed specifically for your instrument. By understanding your needs and doing your research, you can make informed decisions and choose the best equipment for your application.
Furthermore, it’s recommended to stay up-to-date with the latest developments in microphone technology and recording techniques. This can include attending workshops or online courses, reading industry publications, and joining online communities or forums. By staying informed and continually improving your skills, you can stay ahead of the curve and achieve the best possible sound quality. Whether you’re a beginner or an experienced recording artist, upgrading and expanding your microphone setup can help you take your recordings to new heights.
Best Microphones For Beginners Buying Guide
When it comes to purchasing a microphone, especially for beginners, it can be a daunting task due to the numerous options available in the market. The right microphone can make a significant difference in the quality of sound produced, whether it’s for singing, public speaking, or recording music. In this buying guide, we will explore the key factors to consider when selecting a microphone that suits your needs.
Microphone Type
The type of microphone is a crucial factor to consider when buying a microphone. There are several types of microphones, including dynamic, condenser, and ribbon microphones. Each type of microphone has its unique characteristics, advantages, and disadvantages. Dynamic microphones are known for their durability and are often used for live performances, while condenser microphones are more sensitive and are commonly used in recording studios. Ribbon microphones, on the other hand, are known for their warm and smooth sound.
When choosing a microphone type, it’s essential to consider the intended use of the microphone. For example, if you’re planning to use the microphone for live performances, a dynamic microphone may be the best option. However, if you’re planning to use the microphone for recording music, a condenser microphone may be more suitable. It’s also important to consider the sound quality you want to achieve and the type of instrument or voice you’ll be recording. By considering these factors, you can choose the right microphone type that meets your needs.
Polar Pattern
The polar pattern of a microphone refers to the direction in which it picks up sound. There are several types of polar patterns, including cardioid, omnidirectional, and bidirectional. The cardioid polar pattern is the most common and is known for its heart-shaped pickup pattern, which picks up sound from the front and rejects sound from the sides and rear. The omnidirectional polar pattern, on the other hand, picks up sound from all directions, while the bidirectional polar pattern picks up sound from the front and rear.
When choosing a microphone with a specific polar pattern, it’s essential to consider the intended use of the microphone. For example, if you’re planning to use the microphone for public speaking, an omnidirectional microphone may be the best option. However, if you’re planning to use the microphone for recording music, a cardioid microphone may be more suitable. It’s also important to consider the environment in which you’ll be using the microphone and the type of sound you want to achieve. By considering these factors, you can choose the right microphone with the right polar pattern that meets your needs.
Frequency Response
The frequency response of a microphone refers to the range of frequencies it can pick up. A microphone with a wide frequency response can pick up a broader range of sounds, from low bass notes to high treble notes. When choosing a microphone, it’s essential to consider the frequency response and how it will affect the sound quality. For example, if you’re planning to use the microphone for recording music, you’ll want a microphone with a wide frequency response to capture the full range of sounds.
When evaluating the frequency response of a microphone, it’s essential to look at the specifications and read reviews from other users. You should also consider the type of music or sound you’ll be recording and the type of instrument or voice you’ll be using. For example, if you’re planning to record a guitar, you’ll want a microphone with a frequency response that can capture the full range of guitar sounds. By considering these factors, you can choose the right microphone with the right frequency response that meets your needs.
Sensitivity
The sensitivity of a microphone refers to its ability to pick up sound. A microphone with high sensitivity can pick up faint sounds, while a microphone with low sensitivity may struggle to pick up loud sounds. When choosing a microphone, it’s essential to consider the sensitivity and how it will affect the sound quality. For example, if you’re planning to use the microphone for recording music, you’ll want a microphone with high sensitivity to capture the full range of sounds.
When evaluating the sensitivity of a microphone, it’s essential to look at the specifications and read reviews from other users. You should also consider the environment in which you’ll be using the microphone and the type of sound you want to achieve. For example, if you’re planning to use the microphone in a noisy environment, you may want a microphone with low sensitivity to reduce background noise. By considering these factors, you can choose the right microphone with the right sensitivity that meets your needs.
Connectivity
The connectivity of a microphone refers to the type of connection it uses to connect to a device. There are several types of connections, including USB, XLR, and wireless. When choosing a microphone, it’s essential to consider the connectivity and how it will affect the sound quality. For example, if you’re planning to use the microphone with a computer, you’ll want a microphone with a USB connection. However, if you’re planning to use the microphone with a mixer or audio interface, you may want a microphone with an XLR connection.
When evaluating the connectivity of a microphone, it’s essential to consider the device you’ll be using the microphone with and the type of connection it requires. You should also consider the convenience and flexibility of the connection. For example, a wireless microphone may be more convenient to use, but it may also be more prone to interference. By considering these factors, you can choose the right microphone with the right connectivity that meets your needs. When looking for the best microphones for beginners, consider the connectivity options and how they will affect your recording experience.
Price
The price of a microphone is a crucial factor to consider when buying a microphone. Microphones can range in price from under $50 to over $1000, depending on the quality and features. When choosing a microphone, it’s essential to consider the price and how it will affect the sound quality. For example, a more expensive microphone may offer better sound quality, but it may also be more than you need.
When evaluating the price of a microphone, it’s essential to consider the features and quality of the microphone. You should also consider your budget and how much you’re willing to spend. For example, if you’re just starting out, you may want to consider a more affordable microphone to get started. However, if you’re looking for high-quality sound, you may want to consider investing in a more expensive microphone. By considering these factors, you can choose the right microphone that meets your needs and budget.
Frequently Asked Questions
What is the best type of microphone for a beginner?
The best type of microphone for a beginner depends on the intended use. For example, if you’re looking to record vocals, a condenser microphone would be a good choice. Condenser microphones are known for their high sensitivity and ability to capture a wide range of frequencies, making them ideal for recording vocals and acoustic instruments. They are also relatively affordable and easy to use, making them a great option for beginners.
When choosing a condenser microphone, consider the polar pattern, which refers to the direction in which the microphone picks up sound. A cardioid polar pattern is a good choice for beginners, as it picks up sound from the front and rejects sound from the sides and rear. This helps to reduce background noise and isolate the sound source, resulting in a clearer and more focused recording. Additionally, consider the microphone’s frequency response, which should be flat and even to ensure that your recordings sound natural and accurate.
How do I choose the right microphone for my budget?
Choosing the right microphone for your budget involves considering several factors, including the type of microphone, the brand, and the features. If you’re on a tight budget, consider a USB microphone, which is a great option for beginners. USB microphones are relatively affordable and easy to use, as they plug directly into your computer and require no additional equipment. They are also a great option for recording vocals and voice-overs, and are often used for podcasting and online content creation.
When choosing a microphone within your budget, consider the quality of the microphone and the features it offers. A good quality microphone will provide clear and accurate recordings, and may offer features such as a pop filter, a stand, and a carrying case. Additionally, consider the brand and the warranty offered, as a reputable brand will provide a good quality microphone and a comprehensive warranty. By considering these factors, you can find a great microphone that fits your budget and meets your needs.
What is the difference between a condenser and dynamic microphone?
The main difference between a condenser and dynamic microphone is the way they capture sound. Condenser microphones use a capacitor to capture sound waves, which allows them to pick up a wide range of frequencies and provide a detailed and accurate sound. They are also highly sensitive, which makes them ideal for recording vocals and acoustic instruments. Dynamic microphones, on the other hand, use a coil and magnet to capture sound waves, which makes them less sensitive and more rugged.
Dynamic microphones are often used for live performances and public speaking, as they are able to withstand high sound pressure levels and are less prone to feedback. They are also often used for recording loud instruments, such as drums and electric guitars. In contrast, condenser microphones are more delicate and require a power source, known as phantom power, to operate. They are also more prone to feedback and require a more controlled recording environment. By understanding the differences between condenser and dynamic microphones, you can choose the right microphone for your needs.
Do I need to buy additional equipment with my microphone?
Depending on the type of microphone you choose, you may need to buy additional equipment to get started. For example, if you choose a condenser microphone, you will need to buy a microphone stand, a pop filter, and a cable. A microphone stand will allow you to position the microphone correctly and reduce vibration and noise. A pop filter will help to reduce plosive sounds, such as “p” and “t”, and prevent distortion.
A cable will connect your microphone to your computer or recording device, and will allow you to transmit the audio signal. You may also need to buy a microphone preamp or an audio interface, which will provide phantom power to your condenser microphone and allow you to connect it to your computer. Additionally, you may want to consider buying a pair of monitor speakers, which will allow you to listen to your recordings and make adjustments as needed. By investing in the right equipment, you can get the most out of your microphone and achieve high-quality recordings.
How do I set up my microphone for recording?
To set up your microphone for recording, start by positioning the microphone correctly. For vocals, place the microphone 6-8 inches from your mouth, and slightly off to the side. For instruments, place the microphone close to the sound source, but not so close that it picks up too much distortion. Next, connect the microphone to your computer or recording device using a cable, and make sure that the microphone is turned on and set to the correct input.
Once you have set up your microphone, adjust the gain levels to optimize the signal. The gain level should be set so that the signal is strong, but not so strong that it distorts. You can also adjust the EQ settings to optimize the sound, and add effects such as reverb and compression to enhance the sound. Finally, test the microphone by recording a few seconds of audio, and listen back to make sure that the sound is clear and accurate. By following these steps, you can set up your microphone for recording and achieve high-quality results.
Can I use my microphone for live performances?
Yes, you can use your microphone for live performances, but it depends on the type of microphone you have. Dynamic microphones are often used for live performances, as they are rugged and can withstand high sound pressure levels. They are also less prone to feedback, which makes them ideal for live use. Condenser microphones, on the other hand, are more delicate and may not be suitable for live performances, as they are more prone to feedback and require a more controlled environment.
If you plan to use your microphone for live performances, make sure to choose a microphone that is designed for live use, and invest in a good quality microphone stand and cable. You should also consider investing in a microphone with a built-in pop filter, which will help to reduce plosive sounds and prevent distortion. Additionally, make sure to test your microphone before the performance, and have a backup microphone on hand in case of an emergency. By choosing the right microphone and taking the necessary precautions, you can use your microphone for live performances and achieve great results.
How do I care for and maintain my microphone?
To care for and maintain your microphone, start by keeping it clean and dry. Avoid touching the microphone capsule, as the oils from your skin can damage the microphone. Instead, use a soft brush to gently remove any dust or debris that may have accumulated on the microphone. You should also avoid exposing the microphone to extreme temperatures or humidity, as this can damage the microphone’s internal components.
Regularly check the microphone’s cable and connections for damage, and replace them if necessary. You should also store the microphone in a protective case when not in use, to prevent damage and scratches. Additionally, consider investing in a microphone cleaning solution, which can help to remove dirt and grime from the microphone’s surface. By following these tips, you can keep your microphone in good working condition and extend its lifespan. Regular maintenance can also help to prevent damage and ensure that your microphone continues to provide high-quality sound.
Final Words
In conclusion, selecting the right microphone is a crucial step for anyone looking to start their audio journey. With so many options available in the market, it can be overwhelming to make a decision, especially for those who are new to the world of audio recording. However, by considering factors such as budget, intended use, and connectivity options, individuals can narrow down their choices and find a microphone that meets their needs. Whether you’re a musician, podcaster, or videographer, having a good quality microphone can make all the difference in the quality of your recordings.
Ultimately, investing in one of the best microphones for beginners can be a great way to kickstart your audio endeavors. By doing so, you’ll be able to capture high-quality sound with ease, and take your recordings to the next level. With the numerous options available, it’s essential to do your research and read reviews to find the perfect microphone for your specific needs. By taking the time to choose the right microphone, you’ll be well on your way to creating professional-sounding recordings that will impress your audience and help you achieve your goals.